Your colgate.domains cPanel includes a File Manager that allows you to interact directly with the files stored in your web hosting account. This can be useful if you want to upload software that cannot be automatically installed via the Web Applications section of your cPanel, if you need to change the name or permissions of a file or group or files, or if you want to edit a plain text file. To access your files via the File Manager, use these steps:
- Login to colgate.domains with your Colgate username and password.

- Once logged in, you’ll be at the homepage of your control panel. The easiest way to navigate the panel is using the search feature in the top right panel. Click the Search box and type “File Manager” (without the quotes). When you press enter, you will be automatically redirected to the File Manager. You can also find its icon under Files.

- On the left side of the “File Manager” window, you’ll see a navigation menu containing the file structure of your webhosting account. More information about the contents of these files and folders can be found in the “File Structures and the File Manager” documentation in this knowledge base.

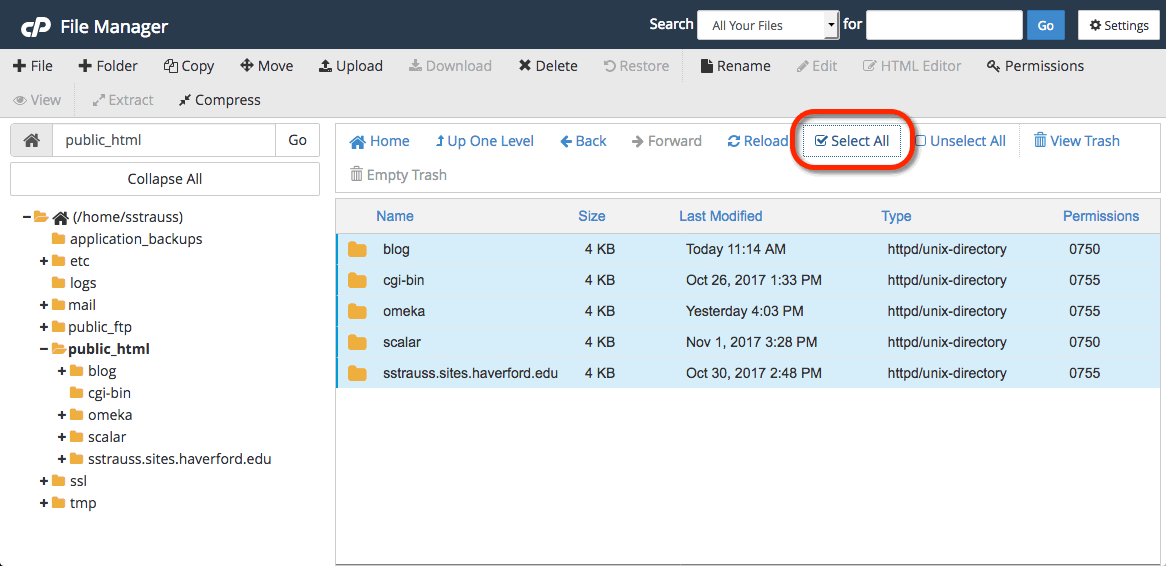
- In the navigation menu, choose the public_html option. This will take you directly into the folder that contains the files associated with your website(s). You’ll notice your current location (the public_html folder) is bolded and highlighted in this menu. Click the [+] (expand) icon next to a folder to see what subfolders it contains, or click on the name of the folder to view all of its contents in the file browser on the right side of the page. You can also navigate through the folders in your account by double-clicking on them in the file browser on the right side of the “File Manager” page.

- To select an item, click once on its icon in the file browser. You can also use the “Select All” button above the file browser, or your computer’s keyboard shortcuts (Shift, Command, Control, etc), to select multiple items from this list.

- Depending on what you have selected, different options will be available to you in the action menu across the top of the “File Manager” page. If you have selected a folder, for example, you can “Rename” it or “Change Permissions” on it, but do not edit it using the Code Editor or HTML Editor.

- If you know exactly what location you want to skip to within your webhosting account, you can type it into the box directly above the navigation menu and click Go.
 Alternatively, if you know the exact name of the file or folder you are looking for, but not its location, you can use the Search box to find it.